Difference between revisions of "Setting Tool Offsets"
m |
m |
||
| Line 3: | Line 3: | ||
The goal is to set the XYZ offset values per nozzle such that all nozzles are aligned relative to each other. In other words, if we start at location (a,b,c) with ''Tool-0'', change to any other tool, and return to location (a,b,c), the nozzle tips should be in more-or-less the exact same spot. In practice we can align tools within 0.02mm of each other in XY using the method below. | The goal is to set the XYZ offset values per nozzle such that all nozzles are aligned relative to each other. In other words, if we start at location (a,b,c) with ''Tool-0'', change to any other tool, and return to location (a,b,c), the nozzle tips should be in more-or-less the exact same spot. In practice we can align tools within 0.02mm of each other in XY using the method below. | ||
| − | == | + | == Measuring Z offsets: Manual == |
This guide shows you how to set the tool height from the bed such that the lowest tip of the tool touches the bed at Z=0. | This guide shows you how to set the tool height from the bed such that the lowest tip of the tool touches the bed at Z=0. | ||
| Line 32: | Line 32: | ||
TODO: FINISH THIS PART. | TODO: FINISH THIS PART. | ||
| + | == Measuring Z offsets: Touchplate Automated == | ||
| + | coming soon | ||
== Measuring XY offsets: Optical Manual == | == Measuring XY offsets: Optical Manual == | ||
Revision as of 19:35, 9 May 2020
This page is a draft and definitely not finished yet
The goal is to set the XYZ offset values per nozzle such that all nozzles are aligned relative to each other. In other words, if we start at location (a,b,c) with Tool-0, change to any other tool, and return to location (a,b,c), the nozzle tips should be in more-or-less the exact same spot. In practice we can align tools within 0.02mm of each other in XY using the method below.
Measuring Z offsets: Manual
This guide shows you how to set the tool height from the bed such that the lowest tip of the tool touches the bed at Z=0.
Note: Bed Temperature
Z offsets can be measured while the bed is either hot or cold, but the temperature of your bed must be stable. If it has recently been heated or cooled-down, wait 3 minutes for the temperature to remain stable at the setpoint before measuring the offset as the aluminum bed plate can expand vertically up to 0.1mm during this time.
Z Offset Detailed Steps
Have a look at the diagram below to get a sense of what we are measuring.
TODO DIAGRAM HERE.
The offset value is the negative distance between tool tip and the limit switch.
First clear any existing offsets for the tool you wish to calibrate.
G10 Px
where x is the tool index.
Lower the bed (increase Z) such that the tool will not crash into the bed when it’s picked up. Then pickup the tool. If it’s an extruder, heat it up to printing temperature and do a retraction (about 10mm) so it doesn’t ooze. Clean any residual ooze if any emerges. Now move it to the apprximate center of the bed with
G0 X150 Y150
To measure the Z offset, select a piece of paper. Measure it’s average thickness by taking a few readings in various spots. Remember that number. Then slide it into the bed above the tool.
Manually step the Z upwards until it just barely “snags” the paper. At this point, your tool is above the bed at a value approximately equal to the thickness of the paper.
TODO: FINISH THIS PART.
Measuring Z offsets: Touchplate Automated
coming soon
Measuring XY offsets: Optical Manual
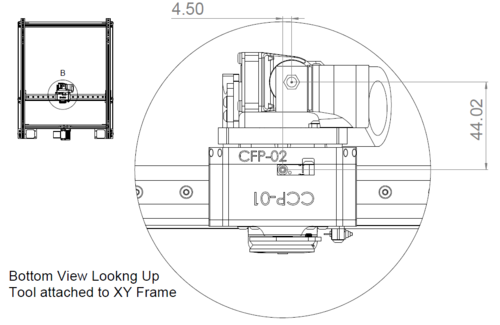
The goal is to find the XY offset from tool to ZProbe as shown in the image below.
But wait!! Sadly it is not sufficient to simply snag the values from the CAD model like above. Each tool is assembled slightly differently, so these values need to be measured on the actual tool itself.
Fret not! This process is very straightforward to do with a cheap USB Microscope.
Measuring and Setting Offsets with a USB Microscope
We use this microscope ($22) for calibration.
The General Idea
Our goal is to have the active tips of all tool move to the same position in the real world when commanded to move to the same position. Our coupling is repeatable, so the a single tool will be picked up in a consistent fashion. But all tools will be assembled slightly differently, so their “pickup” locations will likely all be different. We must dial in a constant offset setting for each tool such that they match each other.
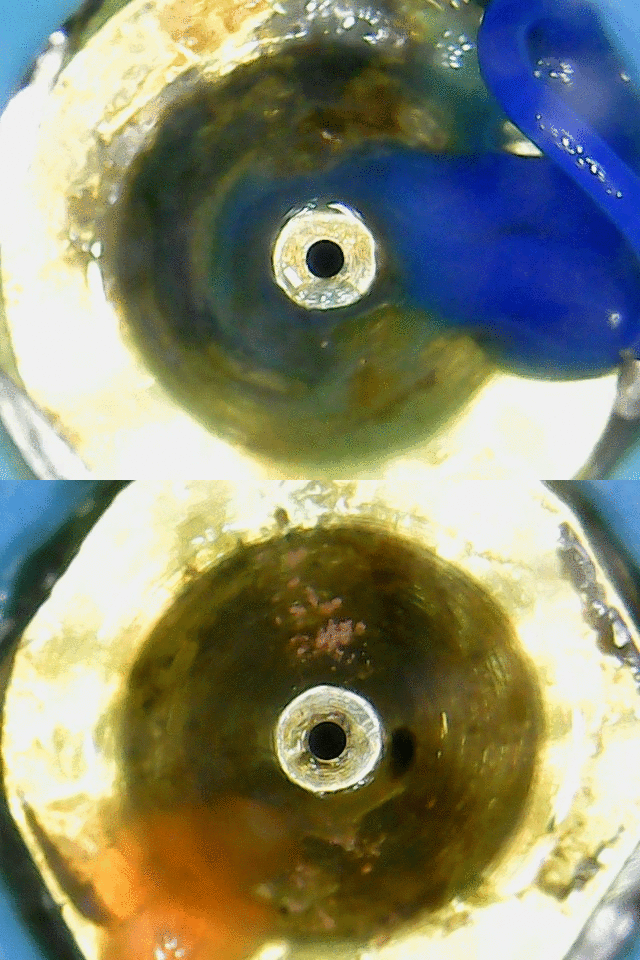
To calibrate the tools against each other. We need a way to measure the differences in positions between tools. One way to do that is with a usb microscope pointed upwards to take pictures of nozzles in the same commanded position and then correcting this position by eye until the nozzles overlap each other. In practice, we can get XY nozzle alignment that’s better than 0.05mm using this method across tools.
To make this work, we need to ensure that the usb microscope position remains absolutely fixed to the frame when we change tools. The default usb microscope is pretty bad at doing this, so we made a better one that you can download and print.
Notes
The main idea is that we will use the first tool’s X/Y location as a reference (or datum) and calibrate the remaining tools relative to the first tool’s location.
Note that it is extremely important that the usb microscope does not move during this time. Tugging on the wire, leaning on the frame, and even moving the bed up-and-down during calibration will all mess with the calibration.
The Procedure
First check your existing configuration file and ensure that no XYZ offsets are being applied to any tools yet. We can identify these as G10 commands.
Pick up tool 0 and position it over a reference position. We chose 150x150 for this example.
Adjust the Z height such that the microscope fits below the nozzle. Manually move the camera to the center of the bed. Focus the microscope on the tip of the nozzle.
With a gluestick such as those used for printing, glue down the PLA microscope stand to the print bed in this position. Ensure that it is securely fastened to the bed.
Take a picture of tool 0.
Now, pick up tool 1. Move it to 150x150 location, and take a second picture.
With a picture-viewing program, flip back-and-forth between the pictures of tool 0 and tool 1.
PICTURE HERE
Use the image of tool 1 to decide what XY directions to move to such that both images have aligned nozzles. Note that one axis of the picture will be “flipped” since the microscope is upside-down pointing upwards. Delete tool 1’s picture.
Now adjust the nozzle slightly (0.1mm) in the XY directions you’ve chosen and take another picture for tool 1. Confirm that (1) the nozzle moved in the direction you wanted and (2) the distance between tool 1 and tool 0 is getting closer.
Repeat this process until tool 0 and tool 1’s images are aligned. At this point look at the XY location of tool 1 and subtract it from 150. This is your G10 XY offset.
Apply the offset directly into your GCode console.
G10 P1 X<some_value> Y<some_value>
Now move the tool to X150, Y150 using:
G0 X150 Y150
Confirm that this location is the correct location. If not, switch the signs of your offset, reapply it, and try again.
Repeat this process for any additional tools you may have, calibrating them against the location of tool 0. When finished, celebrate with a Victory GIF!
Measuring XY offsets: Optical Automated
There is a script available that utilizes an upward looking camera and machine vision to automate the setting of tool offsets for 3D Print tools that have circular nozzles. The final output of the script is G10 commands ready to go into your config.g.
Optical Automated XY: Script Installation
Follow the instructions in the readme https://github.com/DanalEstes/TAMV
Also, OpenCV must be installed. One way to do that is the script available via https://github.com/DanalEstes/installOpenCV. However you choose to do it, do not install 'virtualized'. Most examples on the internet show a virtualized install.
Optical Automated XY: Running the script
Before you run for the first time:
- You will need a USB camera or a Raspberry Pi style camera. Many will work; one recommended USB camera is the Logitech C270.
- The camera must be fixed to the bed, so it is reachable by all tool nozzles.
- The camera must focus about 3 to 4 CM (about 1 to 1.5 inch) above the lens.
- Tool offsets MUST be set well enough that a tool can be placed over the camera. They only need to be accurate to 2mm or so.
- The printer MUST be capable of mounting each tool in succession, with no collisions, etc.
- The script MUST run from the graphic console of the Pi. This can be a physical screen, or a VNC session. For more about VNC, see the [Raspberry Pi org instructions]{https://www.raspberrypi.org/documentation/remote-access/vnc/)
Once all that is ready, run the script
```cd TAMV```
```./TAMV```
It should require no arguments the first time it is run. It will guide you from there.
When the script finishes, it will give you a G10 for each tool. Put these in your config.g.
I will also give you the coordinates of the camera. On future runs, you can specify these and the process will be more automated.

