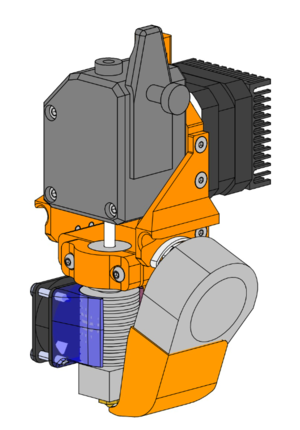
Bondtech Direct Drive Extruder
This is the default extruder. It’s compatible with both an E3D V6 and an E3D Volcano hotend. This extruder will work with the fabrications specs below with nozzle temps up to 250C and a bed plate temperature up to 80C.
Note: motor heatsinks are not optional! If you operate the motors without heatsinks, the tool plates will warp from the heat. Exposure to radiated heat from the nozzle and the bed is fine up to 80C
Parts to Buy
For a set of two extruders, all parts to buy are called out in this spreadsheet tab.
Assembly Tools
3D Printed Parts and Settings
Common Settings
- PLA
- 0.4mm nozzle
- No supports
- 0.2mm layer height
- 6 perimters
- 20% infill (any pattern)
Parts and Special Settings
- Blower Fan Shroud
- Print with support material
- Tool Plate
- 100% infill (yeup, solid)
- Extruder Holder
- Groovemount Clip
- Left Parking Wing
- Right Parking Wing
- Wedge Plate
- 0.1mm layer height. This is critical
- Ooze Wiper
- Tool Cable Management Bracket
- Parking Post Base 55mm
- Tool Holder 55mm
Assembly Instructions
Wiring
There are many ways to wire Jubilee tools, so feel free to take the option below as a suggestion.
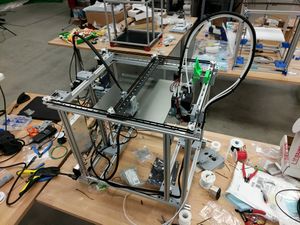
Note that these wires are rather long because they must loop over the frame in an arch fashion and then return under the frame to the back of the machine where they are plugged into the control boards.
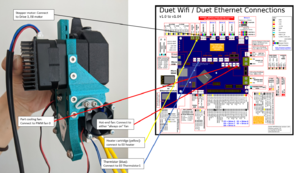
The image on the right shows how to wire tool1 (Extruder 0, E0) to the Duet.
Duet3 Note
Because some slicers send a command to turn off fans at the start of a print (M107) and because that command defaults to fan 0, we recommend not wiring the hotend (heatsink) fan to fan port 0 on the Duet 3 6HC board. For more info, see [this duet forum post].
Software Configuration
Here are the general settings
- 830 [steps/mm] (aka: "Esteps")
- 1250 [mA] Extruder Motor Peak Current
- 0.0 - 0.05 [sec] Pressure Advance
- -5.36 [mm] nominal X offset from The Control Point on the carriage
- 44.7 [mm] nominal Y offset from The Control Point on the carriage
- -2.25 [mm] nominal Z offset from The Control Point on the carriage
Note that your XYZ offsets will be slightly different per tool, and that these values are nominal values (as measured from the CAD model).
Duet 2 or 3
Note that the items shown in < > signs are placeholders and should be replaced with the values you actually have. (Remove the < > signs too!)
The Duet ecosystem assumes that tools are connected to single motor drive. Motor drives are numbered starting from 0. Define a motor drive with:
M569 P<motor_drive_index> S0
(S1 inverts the direction of the motor drive.)
Tools are numbered starting from 0. Define the tool index, tool name, and connect the motor drive that will control it with:
M563 P<tool_index> S"My Chocolate Extruder" D<motor_drive_index> H1 F0
Define the tool offset from the ZProbe trigger location. These can be set to all zero for now and set later.
G10 P<tool_index> X-4.5 Y44.02 Z-2.25
Optional: define the default operating and standby temperatures. These can be omitted since most 3D Printer Slicer programs will set these at the start of the print.
G10 P0 S<extruding_temperature> R<standby_temperature>
Optional: define this extruder's pressure advance value. This can be omitted (implying a value of 0), but a value of 0.1 seems to be a good starting point for this particular extruder.
Use https://github.com/Treysen-Zobell/PressureAdvanceGenerator to calibrate each filament.
M572 D<motor_drive_index> S0.1
The Duet ecosystem assumes that each extruder has a single temperature sensor. Define this extruder's temperature sensor index.
TODO
The Duet ecosystem assumes that each extruder has a single heater cartridge. Define this extruder's temperature sensor index.
TODO
Put all these lines of code in your config file.
Klipper
Not yet implemented


