Difference between revisions of "Lab Automation Plate"
Poofjunior (talk | contribs) |
Poofjunior (talk | contribs) |
||
| (5 intermediate revisions by the same user not shown) | |||
| Line 2: | Line 2: | ||
==Overview and Specs == | ==Overview and Specs == | ||
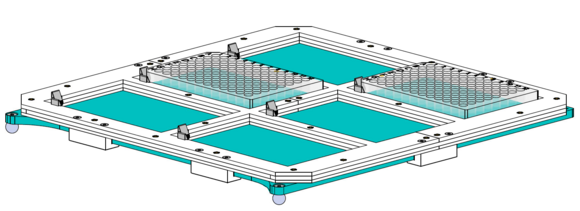
| − | This bed plate holds up to six standard well plates in a repeatable position. It can be fabricated | + | This bed plate holds up to six standard well plates in a repeatable position. It can be fabricated from laser-cut, 3D-printed, and off-the-shelf hardware and assembled with conventional hand tools. |
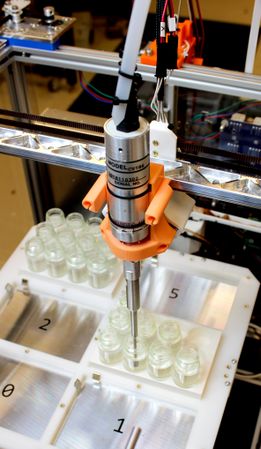
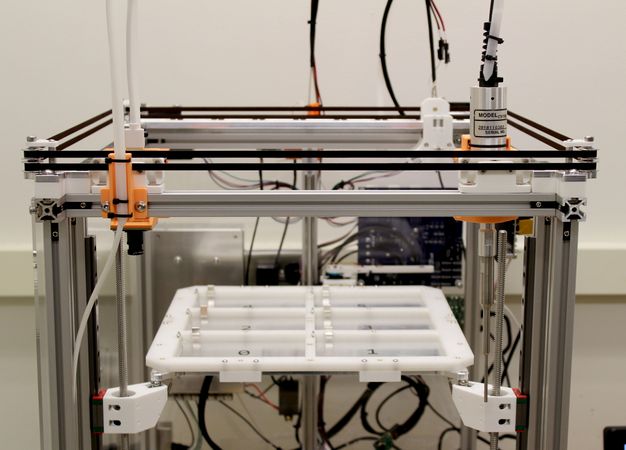
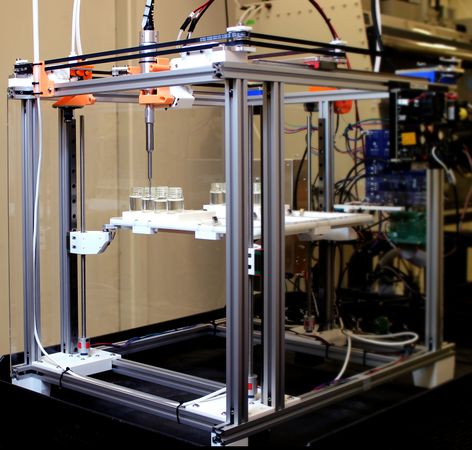
Here's a sample setup where Jubilee has been reconfigured with a Sonication horn to sonicate samples automatically: | Here's a sample setup where Jubilee has been reconfigured with a Sonication horn to sonicate samples automatically: | ||
| Line 15: | Line 15: | ||
== Parts to Buy == | == Parts to Buy == | ||
| + | All stock parts are called out in [https://docs.google.com/spreadsheets/d/1CRx0CG5CowJ8f3cnAN_834ulcMCSQYsPvo_RNgSV1LQ/edit?usp=sharing this spreadsheet]. | ||
== Parts to Make (or Order) == | == Parts to Make (or Order) == | ||
| Line 68: | Line 69: | ||
== Assembly Tools == | == Assembly Tools == | ||
| + | * [https://www.mcmaster.com/5497A52/ 2.0 mm hex key] | ||
| + | * [https://www.aircraftspruce.com/catalog/topages/microstopcountersink.php Countersink Cage] and [https://www.mcmaster.com/3109A31/ 90-deg threaded countersink] and a small hand drill '''or''' [https://www.mcmaster.com/3210A413/ small 90-deg countersink] and drill press | ||
| + | * [https://www.amazon.com/Weller-SP40NUS-40-Watt-Soldering-Iron/dp/B00B3SG6UQ Budget Soldering Iron] and [https://www.mcmaster.com/92160A115/ Heat Set Insert Installation Tip] for installing heat set inserts | ||
== Assembly Instructions == | == Assembly Instructions == | ||
| Line 74: | Line 78: | ||
==Software== | ==Software== | ||
| − | Since Jubilee uses 3-point bed leveling to home the Z axis, you will need to adjust the three test points in your '''bed.g''' config file. | + | Since Jubilee uses 3-point bed leveling to home the Z axis, you will need to adjust the three test points in your '''bed.g''' config file. Here is a suggested '''bed.g''' file with the updated probing locations below: |
| − | < | + | <pre> |
| − | + | G30 P0 X195 Y40 Z-99999 ; probe near back leadscrew | |
| − | </ | + | G30 P1 X240 Y270 Z-99999 ; probe near front left leadscrew |
| + | G30 P2 X65 Y270 Z-99999 S3 ; probe near front right leadscrew and calibrate 3 motors | ||
| + | G1 X0 Y0 F10000 | ||
| + | </pre> | ||
Furthermore, you'll want to home the machine ''before'' installing any labware. Otherwise Jubilee's carriage will collide with it during the homing sequence. | Furthermore, you'll want to home the machine ''before'' installing any labware. Otherwise Jubilee's carriage will collide with it during the homing sequence. | ||
Apart from that, no other software changes are needed for this bed plate. | Apart from that, no other software changes are needed for this bed plate. | ||
Latest revision as of 13:51, 7 November 2021
Overview and Specs
This bed plate holds up to six standard well plates in a repeatable position. It can be fabricated from laser-cut, 3D-printed, and off-the-shelf hardware and assembled with conventional hand tools.
Here's a sample setup where Jubilee has been reconfigured with a Sonication horn to sonicate samples automatically:
Image Credit: Nadya Peek
Parts to Buy
All stock parts are called out in this spreadsheet.
Parts to Make (or Order)
3D Printed Parts and Settings
Print all parts with the following print settings:
- PLA
- 0.4mm nozzle
- No supports
- 0.2mm layer height
- 6 perimeter layers (This is especially critical for parts that have heat-set inserts)
- 20% infill * printable in the provided orientations
- external perimeter first
- uncheck "Detect Thin Walls" if your Slicer has this settings.
- Otherwise, small gaps will not be filled.
| Quantity | Part Num | Part Source | Note |
|---|---|---|---|
| 6 | n/a | bed attachment |
Laser Cut Parts and Settings
The following parts must be laser-cut from 3.175 mm (1/8th in.) Acetal Homopolymer, aka: Delrin. Delrin can be sourced in the United States in sheets of 12-in. x 24-in. from OnlineMetals.
If you are certain that your laser cutter applies automatic kerf compensation (rare), cut the original DXFs. Otherwise, cut the offset DXFs. (If you are uncertain, cut the offset DXFs.)
To download the file, right click, and select "Save Link As."
| Quantity | Name | Original DXF | Offset DXF |
|---|---|---|---|
| 1 | Top Layer Upper Plate | Original | Offset |
| 1 | Top Layer Lower Plate | Original | Offset |
| 1 | Middle Layer Upper Plate | Original | Offset |
| 1 | Middle Layer Lower Plate | Original | Offset |
| 1 | Middle Layer Center Plate | Original | Offset |
| 1 | Middle Layer Left Plate | Original | Offset |
| 1 | Middle Layer Right Plate | Original | Offset |
| 1 | Bottom Layer Upper Plate | Original | Offset |
| 1 | Bottom Layer Lower Plate | Original | Offset |
Assembly Tools
- 2.0 mm hex key
- Countersink Cage and 90-deg threaded countersink and a small hand drill or small 90-deg countersink and drill press
- Budget Soldering Iron and Heat Set Insert Installation Tip for installing heat set inserts
Assembly Instructions
Software
Since Jubilee uses 3-point bed leveling to home the Z axis, you will need to adjust the three test points in your bed.g config file. Here is a suggested bed.g file with the updated probing locations below:
G30 P0 X195 Y40 Z-99999   ; probe near back leadscrew
G30 P1 X240 Y270 Z-99999    ; probe near front left leadscrew
G30 P2 X65 Y270 Z-99999 S3   ; probe near front right leadscrew and calibrate 3 motors
G1 X0 Y0 F10000
Furthermore, you'll want to home the machine before installing any labware. Otherwise Jubilee's carriage will collide with it during the homing sequence.
Apart from that, no other software changes are needed for this bed plate.


